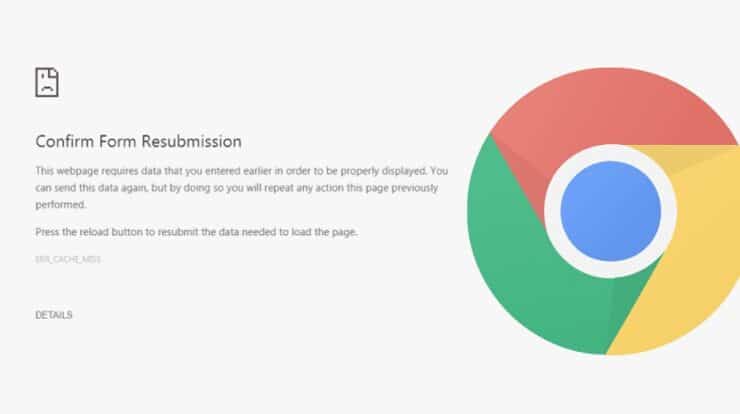
Google Chrome users have almost certainly seen the Err_Cache_Miss error at some time. When cache files that must be provided and saved by a website are missing, the browser, as the name indicates, comes to a halt. The issue might be with the network, the browser, or the website itself. If you get an Err_Cache_Miss error on your Chrome browser, you may attempt to fix it by following these steps if the problem isn’t with the website itself.
Refresh Page And/Or Relaunch Chrome
The most apparent and simple fix to an Err_Cache_Miss error code is to refresh the page you’re attempting to load or to restart Chrome. First, press the Reload this page button to the left of the address bar to refresh Chrome. Alternatively, on your keyboard, press the F5 key.
Note: If you’re having issues buying online or signing up for a service, the refreshing page may cause the data to be sent again. To avoid this, select the URL in the address box and press Enter.
If refreshing the page does not resolve the issue, you may exit Chrome using Task Manager. Using the Task Manager option guarantees that all browser instances are shut down. To close Chrome using Task Manager, follow these steps:
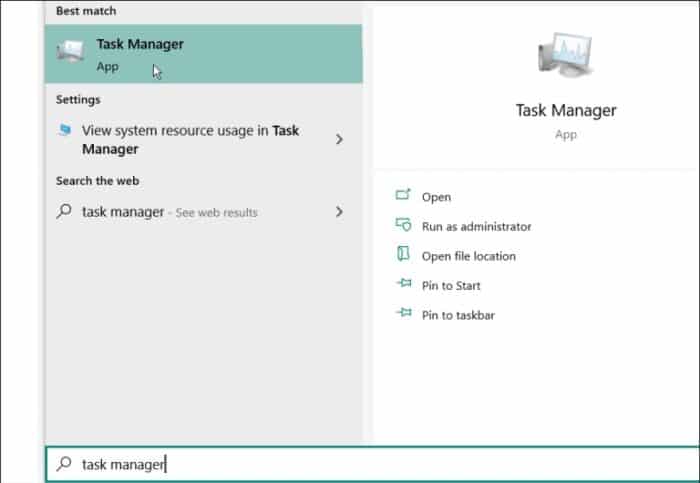
1 – To open the Start menu, press the Windows key, enter task manager, and select the top result.
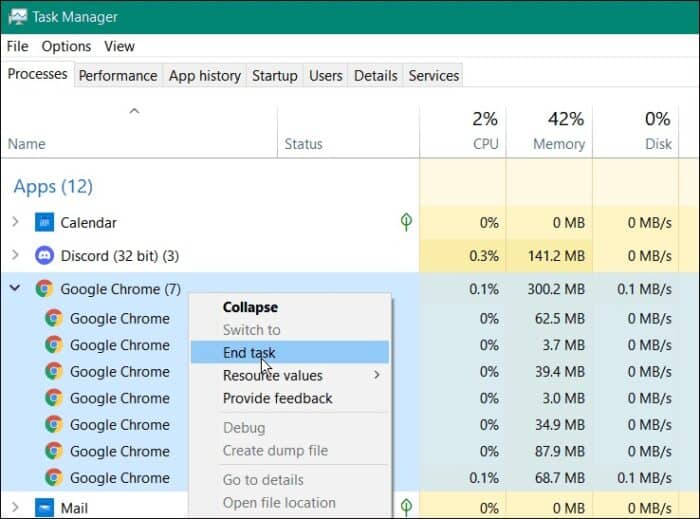
2 – Go to the Processes tab, right-click every Google Chrome instance (you may order processes alphabetically), and then choose End job.
3 – Relaunch Google Chrome and view the page that caused the Err_Cache_Miss error to see whether the problem has been resolved.
Check Browser Updates
Another option is to manually update Chrome by following these steps:
1 – Navigate to Help > About Google Chrome by clicking the three-dot symbol in the upper-right corner of the toolbar.
2 – If an update is available, select the Relaunch option to get the most recent version.
Clear Browser Cookies
If the error persists, try clearing your stored browser data, including cookies. This may often fix an Err_Cache_Miss error code by forcing your browser to reload any previously stored data from a website. To delete cookies and other stored data in Chrome, follow these steps:
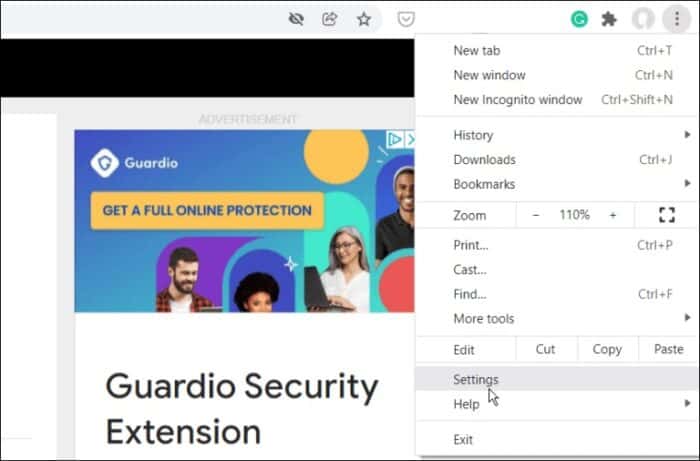
1 – In the top-right area, click the three-dot menu symbol and select Settings from the menu.
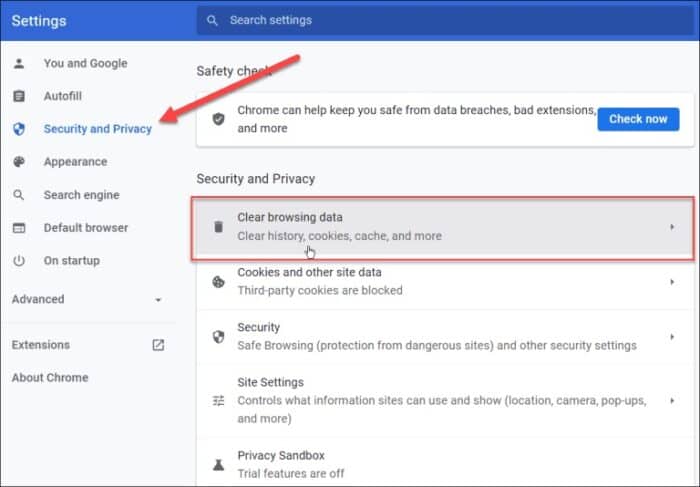
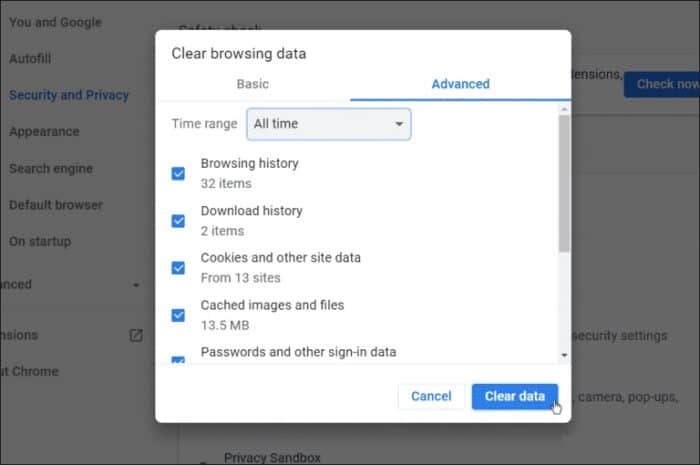
2 – Choose Security and Privacy from the Settings menu, then select Clear browsing data.
3 – When the screen Clear browsing data appears, choose All time from the Time range dropdown menu and then check all items.
4 – When you’re done, click the Clear data button.
Please return to the broken web page when it has finished clearing your browsing data to determine whether the error has been rectified.
Disable Chrome Extensions
Extensions boost Chrome’s capabilities, but they may sometimes impede a website from loading correctly. Antivirus and ad-blocking extensions are often harmful, but any extension could disrupt your browsing experience. Disabling your Chrome extensions can help you resolve this issue. To do this:
1 – Select the three-dot menu symbol in the upper-right corner, then choose More Tools > Extensions from the menu.
2 – A list of your installed extensions will show; browse through the list and disable any possibly troublesome extensions by clicking the slider under the extension description.
3 – As you remove each extension, return to a web page with the Err_Cache_Miss problem and refresh the page. You may need to deactivate a couple of them to figure out which one is causing the problem.
Check Network Settings
If none of the following options work, your network settings may be the issue. For example, you may need to overcome a lot of DNS or other connection issues before fixing this error.
Run Internet Connections Troubleshooter
Well, running the Internet Connections troubleshooter in Windows 10 and 11 is one of the easiest initial options. To use the Internet Connections Troubleshooter, follow these steps:
1 – In Windows 10, go to Start -> Settings -> Update & security -> Troubleshoot -> Additional troubleshooters -> Internet connections to launch the Troubleshooter.
2 – In Windows 11, navigate Start -> Settings -> System -> Troubleshoot -> Other troubleshooters, and click the Run button next to Internet Connections.
When the Internet Connections troubleshooter appears, follow the on-screen directions of the wizard. The troubleshooting works the same on Windows 10 and Windows 11. If no issue is found, go to the next step.
Manually Reset Network Connections
You may also use your Windows 10 or 11 PC to reset your network connection. This will stop any conflicting settings preventing your internet from operating correctly. The commands are the same for Windows 10 and Windows 11. To manually reset network settings in Windows 10 and 11, follow these steps:
1 – Right-click the Start menu and choose Windows PowerShell (Admin) from the menu.
2 – When the PowerShell screen appears, execute the following (in sequence) commands to reset your network connection.
ipconfig /release

ipconfig /flushdns

ipconfig /renew

netsh winsock reset
Disable Chrome Caching
If you’re still seeing Err_Cache_Miss in Chrome, another workaround is to disable the Google Chrome caching engine temporarily. To turn off Chrome caching:
1 – Launch Chrome and go to a page that displays the Err_Cache_Miss error.
2 – In the top-right corner, click the three-dot menu symbol and choose More Tools > Developer Tools from the menu.
3 – Next, go to the Network tab and activate it by checking the Disable cache option.
Reload the page containing the error, and the error should be gone. However, with the Chrome cache engine off, certain data (such as cookies or form data) may not be stored or preserved effectively.
Conclusion:
Hopefully, one of the options described above will stop and/or fix the Err_Cache_Miss error code in Google Chrome. If you often encounter errors with Chrome, consider switching to another browser like Firefox or Microsoft Edge.
