Your new computer is ready and simply waiting for a mouse click. Wait! Wasn’t there another option? One of the fundamental procedures that most of us overlook or overlook is monitor color calibration. Pixel-perfect monitor calibration is a must-have for photographers and graphic designers. You are well-versed in monitor calibration if you are any of these people. Others should continue reading.
Why Is Display Calibration So Vital?
A decent monitor is a costly undertaking. However, its effect will only diminish if you take the time to calibrate your monitor correctly (and seldom). The colors on the screen may partially represent what they are. Assume you captured a stunning panoramic photograph and saved it on your computer. Only to discover that the blue of the sky or green of the grass does not match what you saw through the viewfinder.
Nowadays, it’s all about watching movies online, taking digital images, and exchanging image files. Color calibrating your monitor is essential to get as near to the genuine thing as possible. For the task, graphics specialists will pick up serious color accuracy test tools, such as the Datacolor Spyder5Elite S5EL100 Monitor Calibration System. Some of you will use the OS’s built-in monitor calibration program.
How To Calibrate Monitor On Windows & Mac?
Down display calibration tools are included with Windows and macOS. Microsoft relocated it from the Control Panel to its independent program in Windows 11.
Calibrate Display On Windows
To use the Display Color Calibration tool, press Windows + S or the Start menu, search for “calibrate display color,” open the corresponding result, and follow the on-screen instructions. On Windows 10, go to Start > Control Panel > Appearance and Personalization > Display to access the previous version. The tool will walk you through fundamental color settings, brightness and contrast adjustments, and adjusting the RGB color balance. After that, you may start the ClearType Text Tuner “to ensure that text appears correctly.”
Tune ClearType Text On Windows
To manually open the ClearType Text Tuner, use Windows + S, search for “adjust ClearType text,” and then follow the on-screen instructions. You’ll choose the text samples that seem best to you on each of the five displays.
Calibrate macOS Display
Use the Display Calibrator Assistant on macOS. It is accessible through the Apple menu > System Preferences > Displays > Preset > Calibrate Display… Spotlight is another option.
Top Monitor Calibration Tools You Can Try
We may also get some aid online from basic monitor calibration websites that have been around for a long time.
1. The Lagom LCD Monitor Test Pages
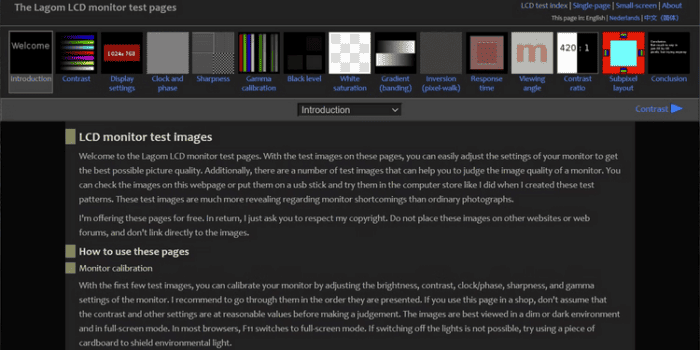
Lagom LCD Monitor Test Pages are a far more extensive set of tools than Photo Friday. The website contains a series of test patterns that start with assessing contrast and end with checking the monitor’s reaction times. It is best to take the tests in the sequence they are listed. For example, use the first several images to test brightness, contrast, and sharpness. Use a later test, such as the “Viewing Angle,” with those set to check whether the display brightness or colors change in the corners. It may seem daunting to a newbie. However, the test patterns are accompanied by useful explanations. The developer also claims that you may put the images on a USB stick and test them out while shopping for an LCD monitor at a computer store. There is a 120KB ZIP file download provided.
2. Photo Friday
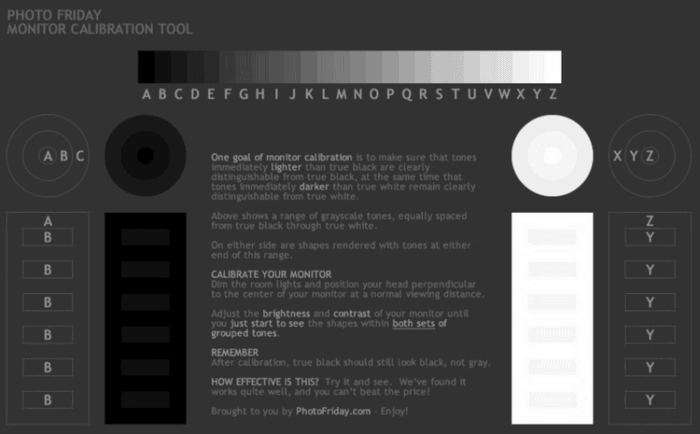
Photo Friday is a website dedicated to photography. Consider the difficulties involved in altering the brightness and contrast of a photo, and you’ll see why you should calibrate your monitor. So, click the link above or head to the site for their monitor calibration tool. The website provides this easy one-page monitor calibration tool that uses grayscale tones to adjust the brightness and contrast of your screen. The goal is to adjust the monitor settings (or buttons) such that the shift of tones from pure black to true white is obvious. After calibration, the blacks should be completely black, with no hints of gray. The instructions start by advising you to lower the lights and press F11 to display the grayscale chart in full-screen mode. Examine your monitor from your standard viewing distance.
3. Monitor Calibration and Gamma Assessment
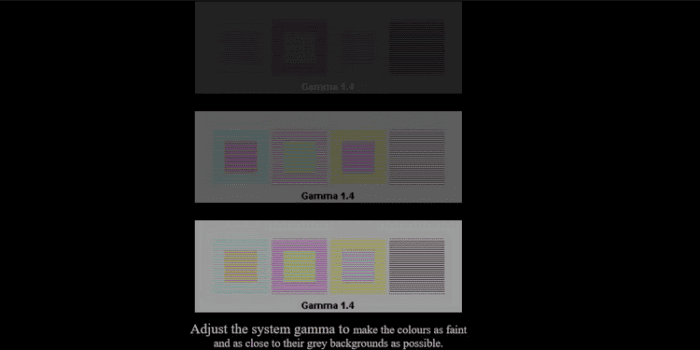
Remember how we were discussing Gamma values just now? This whole page, as well as the linked test, is dedicated to it. The significance and method are put out and benefit any tyro. The most significant conclusion is that gamma values affect color saturation and hue. The author also includes a series of “Gamagic” test patterns that you may use to calibrate your monitor. Please rely on your eyes and adjust the gamma setting using the monitor settings until all squares are as near their backgrounds as feasible. Head to the Gamma page and choose a target gamma from the list if you want to skip the lectures and start testing immediately.
4. Online Monitor Test
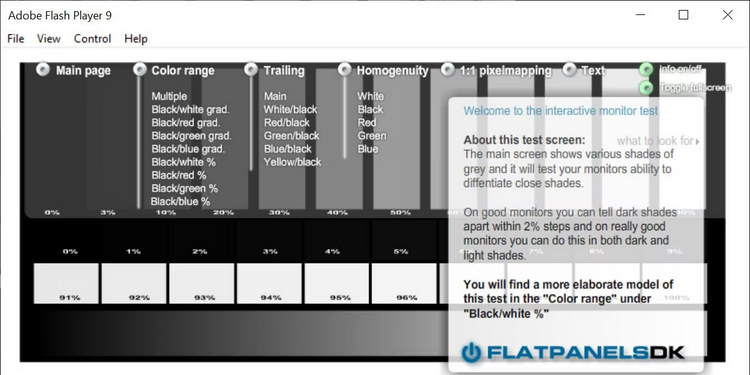
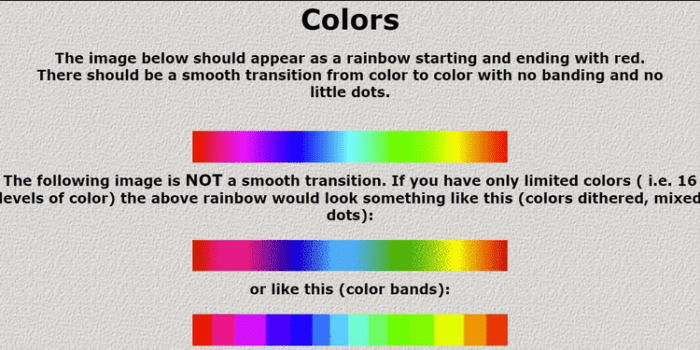
The Online Monitor Test website offers a variety of interactive tests to help you adjust the colors on your screen. When you move your mouse to the top, the menu displays. It begins with a test that evaluates brightness and contrast throughout the B/W tonal range. It’s similar to the test we covered on the Photo Friday website. The Color Range test determines if your monitor can create color gradients smoothly. You may pick several color schemes from the menu. Look for “ghost images” or visual trails in the Trailing test. Move the box across the screen to see if any trails appear. The settings and choices for changing the box’s color and form are located at the bottom.
The Homogeneity test aids in the identification of broken pixels, and malfunctioning monitors with backlight leaking. The final two tests in the lineup are 1:1 pixel mapping and text blur testing. While the former is less of a problem with LCD computer monitors, the latter is worthwhile if your screen text needs to be clearer. If you’re setting up a twin monitor setup, run the Text Reproduction test across both monitors and check for input latency. Above, we linked to the test version that needs JavaScript. Most browsers will not support the Flash versions of the test; therefore, visit the Online Monitor Test webpage to download the executable (no browser plugin necessary).
5. W4ZT
This single-page screen calibration chart includes a handful of the test images covered in previous tools. Adjust the gamma, grayscale, and color. Its one advantage is that it is simple to grasp. Follow the directions to adjust your monitor for optimal viewing.
How Is Your Own Color Perception?
You need a decent eye. But how do you rate your color perception? Take this fast (yet entertaining) color challenge test to find out. Also, before you start fine-tuning your monitor, be sure to follow these three guidelines.
- Turn on your monitor and let it warm up for around 30 minutes.
- Set your monitor to its greatest native screen resolution.
- Learn how to use your monitor’s display controls.
Also, Take A Look At:
Conclusion:
Most people do not need to agonize over the processes or rely on third-party tools. These simple tools should suffice unless you are a skilled photographer or graphic designer who wants high-fidelity colors. If you’re setting up twin monitors, things become more complicated.
