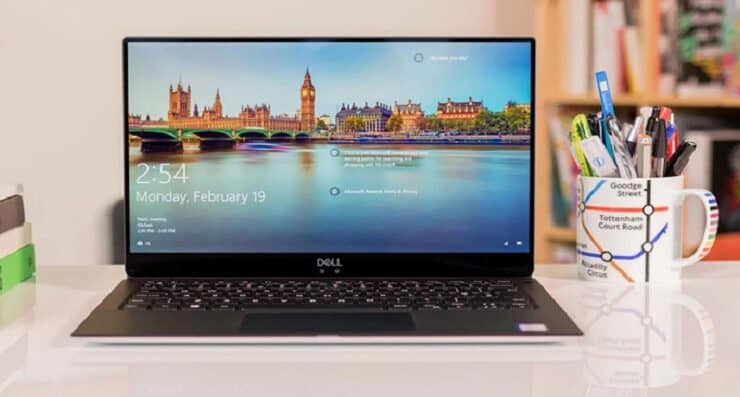
During the period prior to the advent of screenshot functionality, the concept of a straightforward tool that could effortlessly grab an exact representation of your display’s content was unimaginable. This piece provides a guide on two distinct methods for Taking a screenshot on Dell laptops and desktop computers.
However, if your goal is to quickly move to the optimal method for capturing screen images and conveniently incorporating useful notes such as arrows, rectangles, annotations, and emphasis, then:
A Screenshot: What Is It?
A screenshot, also known as a screengrab or screencap, captures precisely what is currently shown on your computer screen. In today’s digital world, the benefits of taking screenshots are seemingly endless. We’ve always understood that an image can capture attention and convey information more effectively than extensive text, and the growing use of screenshots continues to prove this point.
Imagine you’re seeking input from your coworkers on a new website you’ve developed, or perhaps you’re looking for their opinion on the digital flyer you’ve created. Your coworkers might review the material and note any potential changes or enhancements. Or, they could simply take a screenshot, highlight the areas requiring adjustments, and forward it to you. The second option would be much easier and more effective.
Screenshots can be very helpful when you’re experiencing issues. Frequently, when you contact IT or Web Support teams with a problem, they’ll request a screenshot. Providing one can significantly simplify the process for the support staff to grasp the issue at hand and determine how to resolve it.
However, there is more to it. Imagine you are putting together a guidebook for your group. Just capture some screen images and demonstrate the precise procedures. Why spend unnecessary effort crafting long-winded text when you can efficiently use markings and notes on your images to steer them in the right direction?
With that in mind, a screenshot can be incredibly useful for both individual and work-related purposes. If you’re operating a Dell laptop or desktop and you’re uncertain about the method to take a screenshot on a Dell gadget, continue reading for instructions.
How To Take A Screenshot On Dell Laptops And PCs
Numerous straightforward methods exist for capturing a screenshot on your Dell Laptops. These techniques are applicable to all models and series of laptops alike. Below is a guide on how to Take a screenshot on Dell laptops and desktops PC.
First Method: The Print Screen (Prt Sc) Combinations
Different models of Dell laptops might have different labels for the Print Screen key, typically noted as ‘PrtSc‘. It’s also associated with F10 and placed on the upper row of your keyboard. On certain Dell laptops, the key is situated next to the ‘Delete‘ key.
By pressing the Print Screen key along with specific keyword pairings, you have the ability to take screenshots in various sizes. This technique is compatible with Windows 8, Windows 8.1, and Windows 10. Here are the steps to do it:
- If you want to capture the entire screen Press the Windows and Print Screen keys together in a single action. You will notice a brief flash on your screen, indicating that a screenshot has been captured successfully.
- To take a screenshot of a particular window that is open, simply select the window you wish to capture by clicking on it and then simultaneously press the Alt and Print Screen (Prt Sc) keys.
- Finally, to capture an image of every open window on your screen, just hit the Print Screen key.
What is the Location of the Screenshot Folder?
After capturing a screenshot on your Dell laptop, the image is transferred to your clipboard. You can then insert it into a photo editing program (like Microsoft Paint) and proceed to save it.
2nd Method: Using a Snipping Tool on a Dell laptops, take a screenshot
Should you decide to select an alternative, the Snipping Tool is at your service. This integrated function within Windows enables you to take screenshots in various forms. To access the Snipping Tool, press the Start Menu button and enter ‘Snipping Tool’ into the search bar. Once you do, you’ll find the application along with a range of choices available for use.

Click on ‘New’ or use the keyboard shortcut ‘Ctrl + N‘. Select the desired format for your screenshot. By default, the screenshot will be rectangular, but there are three additional shapes available to choose from.
- The Free Form Snip: This function allows you to take screenshots in a variety of shapes according to your preference.
- The Window Snip: The Window Snip feature allows you to easily take screenshots of your open windows using just a single click.
- The Full-Screen Snip: The Full-screen Snip tool takes a snapshot of your whole screen simultaneously. This function is especially useful for those who use more than one monitor.
After capturing your screenshot, hit ‘Ctrl + S‘ to store the picture in the preferred directory.
3rd Method: Take A Screenshot On Dell Laptops Using Markup Hero
This user-friendly yet robust software doesn’t just allow you to take screenshots; it also provides a platform to modify and label them while you’re on the move. It lets you seize your insights and points of interest, highlight them, and pass them along to your peers and workmates. Moreover, it gives you the ability to categorize your snapshots, arrange them neatly in designated folders, and tag them for easy retrieval. These functionalities are incredibly useful for collaborative groups, especially those involved in outsourced software development work, because they promote effective dialogue and steer project coordination across various geographical areas and time frames. Plus, you’re able to upload your images online, which can greatly facilitate clear communication and streamline your work processes.
Here is the method for Taking A Screenshot On Dell Laptops and desktops by Using Markup Hero:
Downloading Markup Hero
Initially, you must obtain the Markup Hero application. It is available at no cost, and registration is not required. Markup Hero Functions flawlessly across all prominent platforms, such as Windows, ChromeOS, MacOS, and Linux.
Installing Markup Hero
After successfully downloading Markup Hero, navigate to the ‘Downloads’ folder on your laptop or computer, and initiate the installation by double-clicking the .exe file.
That’s all there is to it. No additional configuration is needed. Simply hit Ctrl + Shift + 1 at the same time to launch the application.
How Markup Hero Works
Using Markup Hero, you have the ability to capture a part or all of your screen in a screenshot. After the screenshot is taken, the image is uploaded to the internet by the tool. Markup Hero provides you with options to annotate, emphasize, and modify your image as needed.
Markup Hero will significantly reduce the time you spend managing your screenshots by allowing you to neatly arrange them for future retrieval. Additionally, it provides the capability to modify and refresh your notes. Leveraging tags enables you to swiftly locate the specific item you need.
Here are some activities you can engage in using Markup Hero:
- Capture images or upload files, including PDFs, and documents from Google Drive, like Docs, Sheets, and Slides.
- Incorporate various forms of annotations and markups such as arrows, text blocks, emphasized areas, a range of colors, elliptical shapes, rectangular outlines, among others.
- Arrange your screen captures and conveniently distribute them to your friends.
- Adjust the privacy settings on your screenshots to ensure they are either visible only to you or to your friends as well.
- Create several pages and merge screen captures into a slideshow.
ALSO SEE:
Final Words
Your Dell Laptops And PCs comes equipped with several methods to capture a screenshot. However, if you’re looking for an extensive range of choices that not only allow you to take screenshots but also offer additional functionalities, you might want to consider using different tools.